Step-By-Step: Bring Incoming Email to Your SharePoint Online Instance
SharePoint Online can go a long way toward boosting organizational efficiency – however not all of its most helpful features are configured out of box. Some may not even appear to exist at all. The latter is true of one of SharePoint on-prem’s more-popular capabilities: incoming email. While this time and headache-saving ability doesn’t exist in SharePoint Online yet, you can spin up an approximation of it. Even better, doing so doesn’t require a deep understanding of and devotion to all things SharePoint.
Before we get into how to bring this feature (more or less) to SharePoint Online, let’s talk a little more about why you’d want to do so. As mentioned above, it can save time and headaches. How? Incoming email allows users to email documents directly to a SharePoint library instead of to another user. This ensures key business documents will be available to those who need them – even if a contact forgets to include everyone on the initial email.
So, how can we bring an incoming email-like feature to SharePoint Online? We sat down with our Application Services team to get their advice on how to make it happen.
Enabling incoming email in SharePoint Online
There are actually a couple of ways to realize this functionality, but our team recommends leveraging Microsoft Flow. Here’s a step-by-step look at what you’ll need to do:
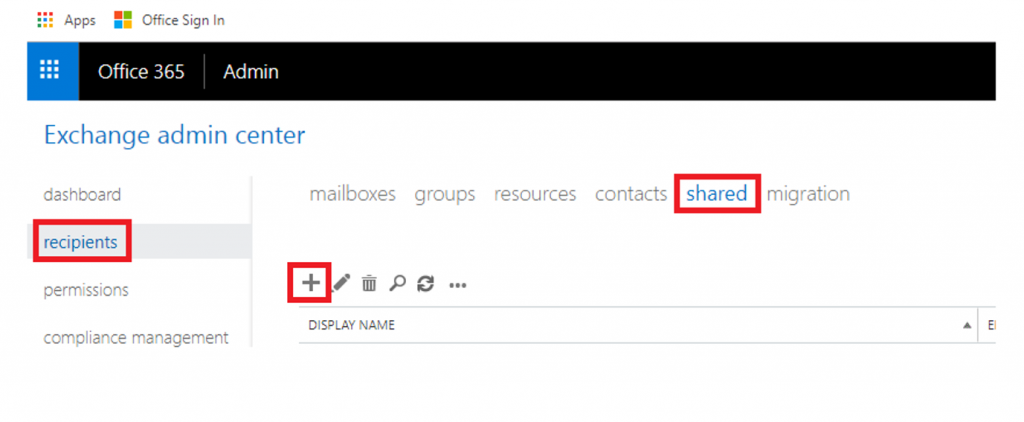
Step 1: Create a shared mailbox in Office 365. First, you’ll need to spin up a new mailbox and tie it to a SharePoint document library. Shared mailboxes make the most sense because they don’t require their own license, but a user mailbox will also work. Tip: For new mailboxes, use an address that reflects its purpose, e.g., SOWs@company.com.
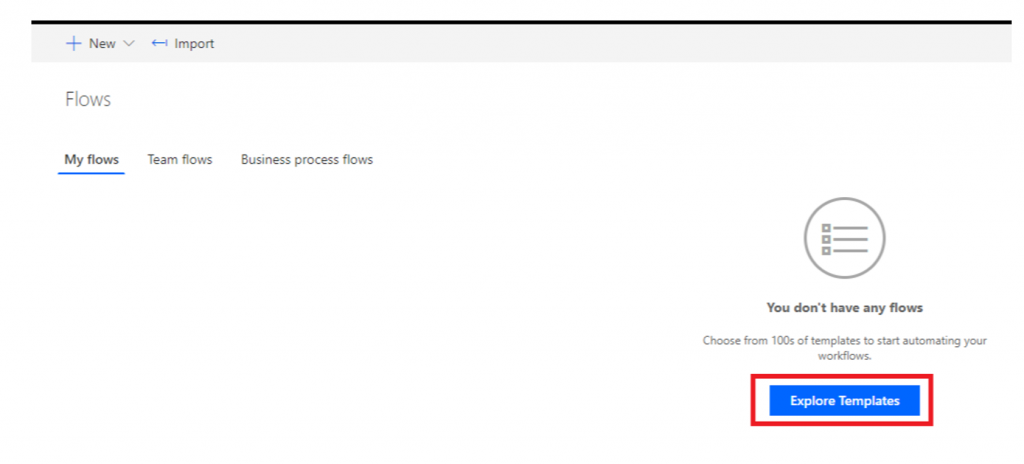
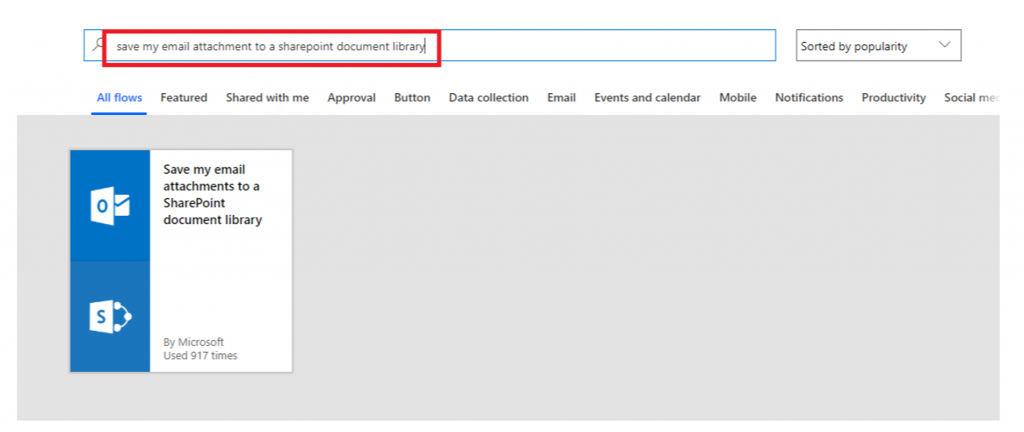
Step 2: Select a Flow. This step sounds like it may involve some heavy lifting, but the template for enabling SharePoint incoming email already exists. To use it, click “Explore Templates” and then search for “save my email attachment to SharePoint document library” within Microsoft Flow. From there, you’ll be able to create the Flow. However, that’s not quite all.
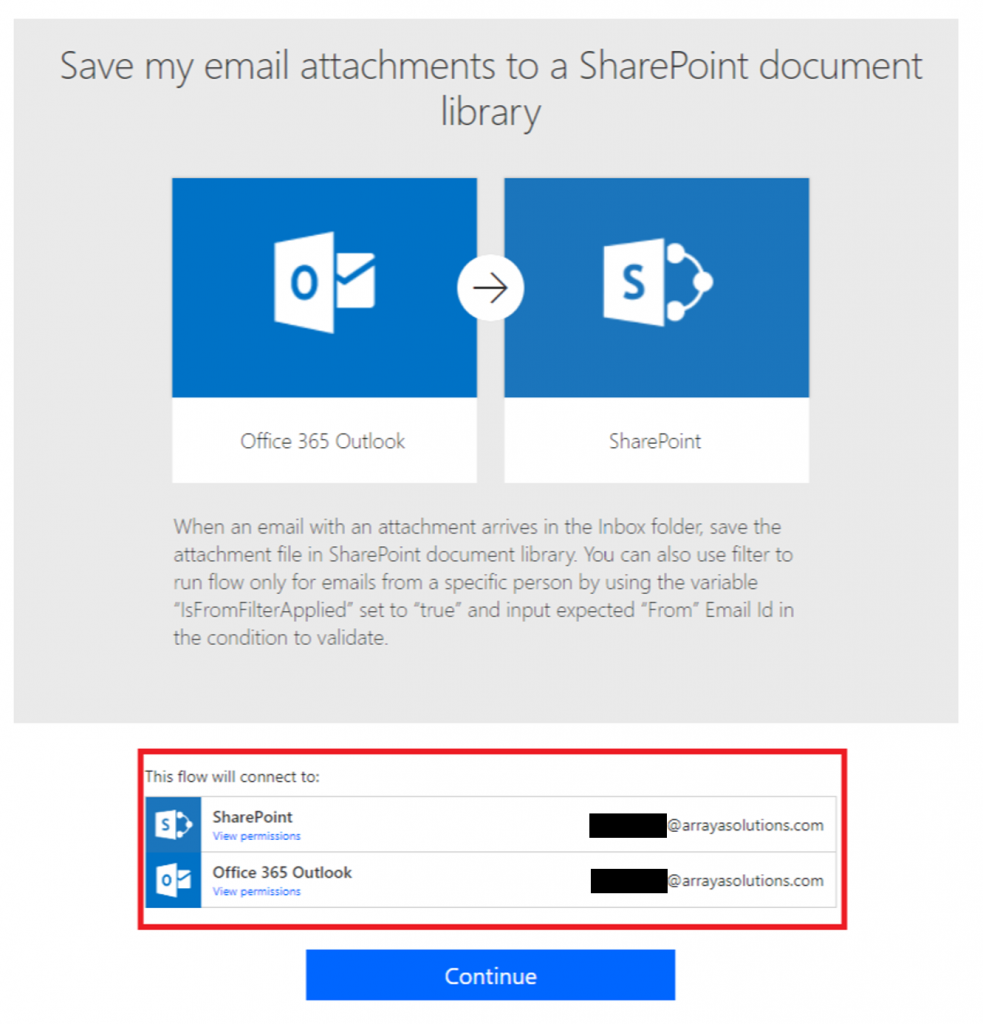
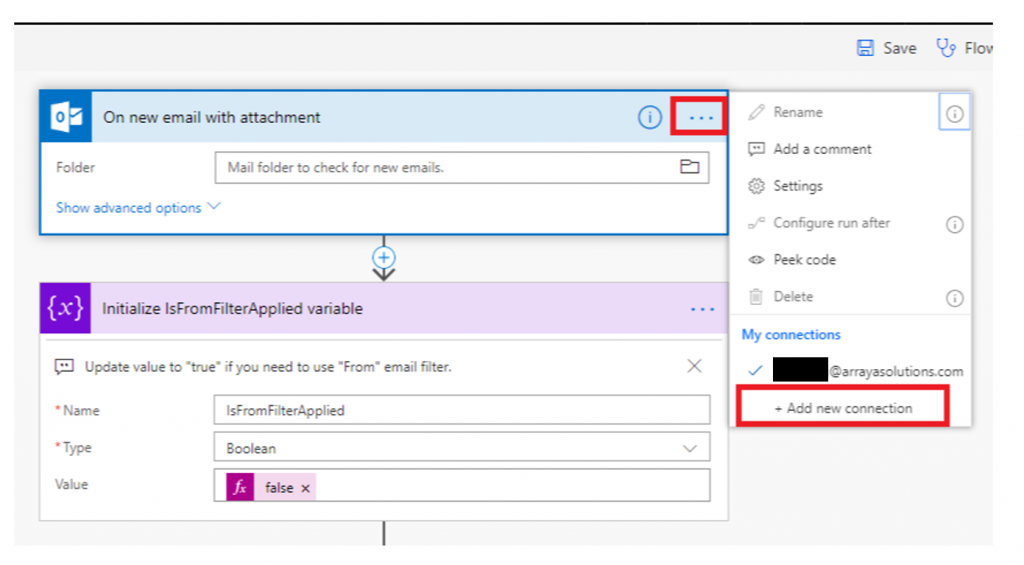
Step 3: Configure the mailbox side of the Flow. Even though the process exists, there are still some adjustments to be made. Start by adding the newly-created shared mailbox from Step 1 to the process using the “Add new connection” option. After that, click on the folder next to the text box reading “Mail folder to check for new emails.” Inside this window, select “Inbox” as well as set any appropriate triggers, e.g., “Has Attachment” and “Includes Attachment” to ensure the Flow triggers as intended.
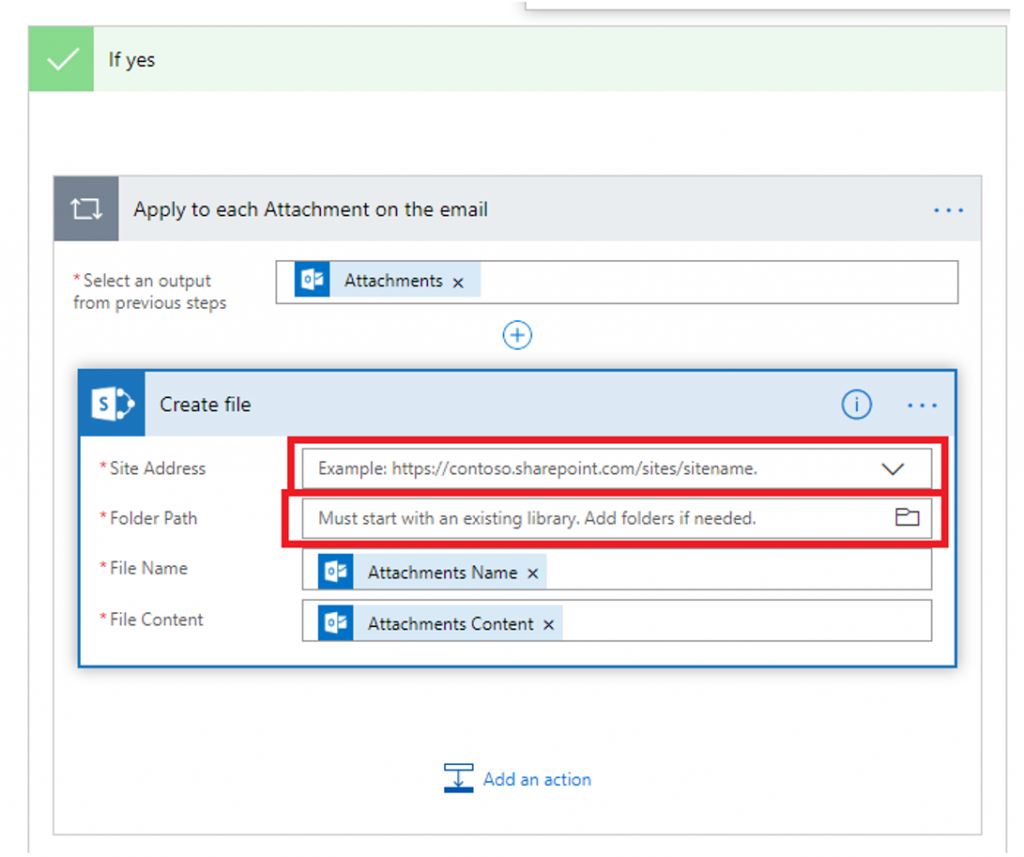
Step 4: Configure the SharePoint piece of the Flow. With half of the Flow set, let’s look at the SharePoint side of things. Here’s what you need to do to ensure attachments are routed to the correct folder. In the “Apply to each attachment on the email” window, you’ll be able to designate the address of the desired SharePoint site in the Site Address bar. Then, enter its destination into the Folder Path field.
That’s it! You’ll want to test out the process with a dummy email and attachment to ensure everything is functioning correctly before turning it loose in the wild. However, if you followed the steps above, you should be able to enjoy all of those benefits of incoming email that we discussed above while in SharePoint Online.
Next steps: Get the most out of your SharePoint environment
Interested in learning more about how to optimize your SharePoint environment? Arraya’s SharePoint Development Services cover all aspects of building and maintaining a reliable, cutting-edge and cloud-based collaborative environment. Our team of SharePoint experts can work with stakeholders to design and support a SharePoint platform that can boost organization-wide efficiency and help businesses gain a leg up on their competition. We’d love to start a conversation around how we can help you reach your goals. Get started here.
We want to hear from you! Let us know what you think of this blog by way of social media. Arraya can be found on LinkedIn, Twitter, and Facebook. While you’re there, follow us to stay up to date with our industry insights and unique IT learning opportunities.
