How to Allow (and Perform) Self-Service Password Resets in Microsoft 365
To put it bluntly, no one enjoys password resets. For IT, they mean time away from more pressing tasks. The same is true for end users left locked out of their workdays, while they wait for the help desk to step in. It’s a time drain for both sides, but it’s one that can be easily prevented through the miracle of self-service password resets.
Microsoft 365 includes a self-service password reset feature that can get users back to work quickly without pulling IT resources away from higher value deliverable. As an admin, here’s how you can activate this feature for your users:
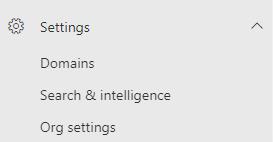
- From the admin portal, select Settings, then Org Settings

- Select the Security & Privacy tab located near the top of the Org Settings page

- Click on Self-service Password Reset

- From this menu, choose Go to the Azure portal to turn on self-service password reset

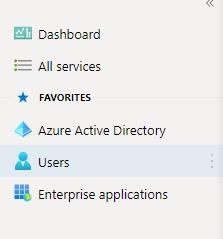
- From the navigation pane on the left side of the screen, select Users

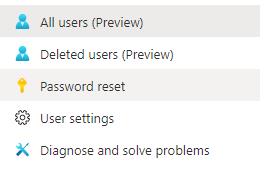
- Select Password reset on the Users | All users page

- While on the Properties page, select All to give everyone across the organization the ability to perform self-service password resets

- Click Save

Just like that, users will have the ability to reset their own expired or simply forgotten passwords by themselves. Having that ability and actually doing it are two separate things. After all, not all users will be comfortable addressing their own password problems. At least not right away. Here’s a step-by-step guide on how to change a password within Microsoft 365 that can help them feel more at ease.
- Sign in to your Microsoft 365 account (Note: You can do this by visiting office.com/signin)
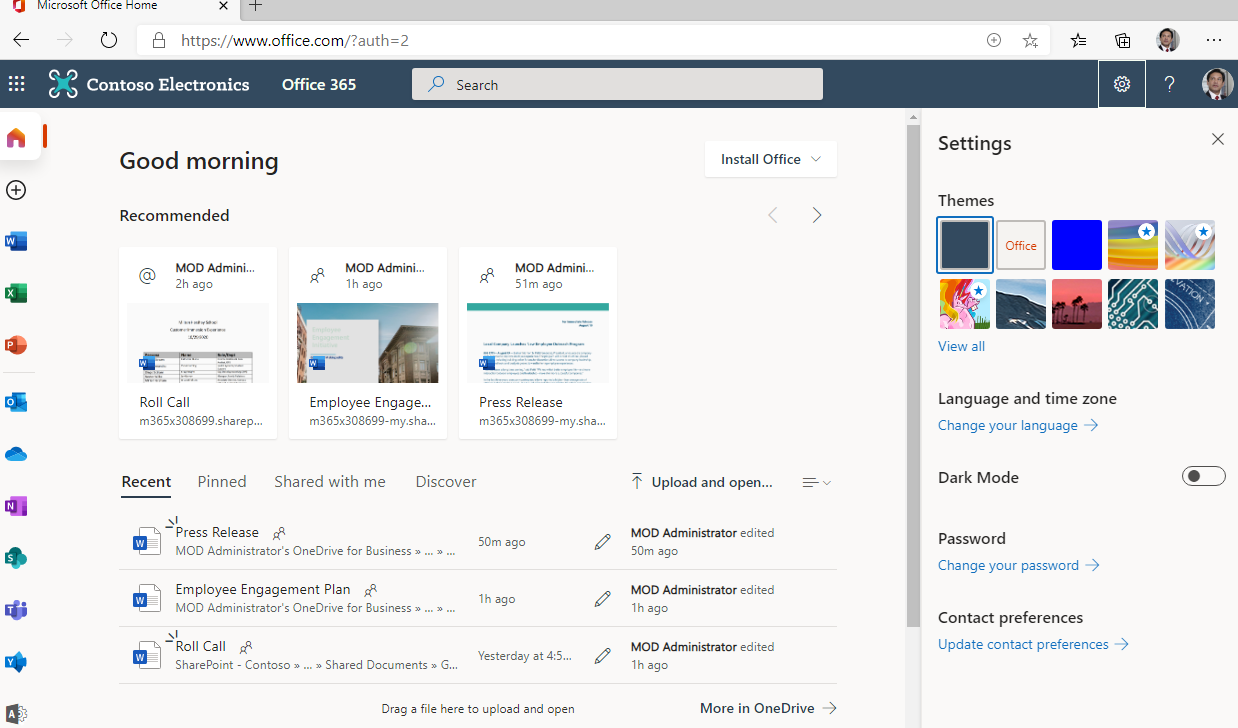
- Click on the gear icon in the upper right hand corner of the screen. This will open the Settings sidebar

- From the Settings sidebar, click on the Password option to launch the Change Password screen

- Enter your current password into the Old password field
- Type a new password into the Create new password field (Note: Your organization’s password complexity requirements will be highlight at the top of the page. These will need to be followed in order for the new password to be accepted. A drop down will appear under the Create new password field to let you know when your new password has met the complexity requirements)
- Enter that new password a second time into the Confirm new password field
- Click Submit

That’s it! It’s a simple enough process that can be accomplished so much faster than the old process of “File a support ticket” and “Wait.”
Next Steps: Get more tips for working in (and managing) M365 and beyond
Want more tips and best practices on how to get the most out of your technology footprint, including but not limited to the Microsoft 365 platform? Arraya can help. Reach out to our team today for more advice and insights on building and managing a high-performing, secure IT environment.
Visit https://www.arrayasolutions.com//contact-us/ to connect with our team now.
Comment on this and all of our posts on: LinkedIn, Twitter, and Facebook.
Follow us to stay up to date on our industry insights and unique IT learning opportunities.
